 FAQ
FAQ
FAQ
FAQ
If your company uses QuickBooks for accounting and financial management while using Ragic to manage operational data such as sales, purchasing, and human resources, you can integrate the two systems using Make.com or Zapier to eliminate repetitive data entry. For example, you can automatically create a QuickBooks Invoice whenever a new Sales Order is created in Ragic.
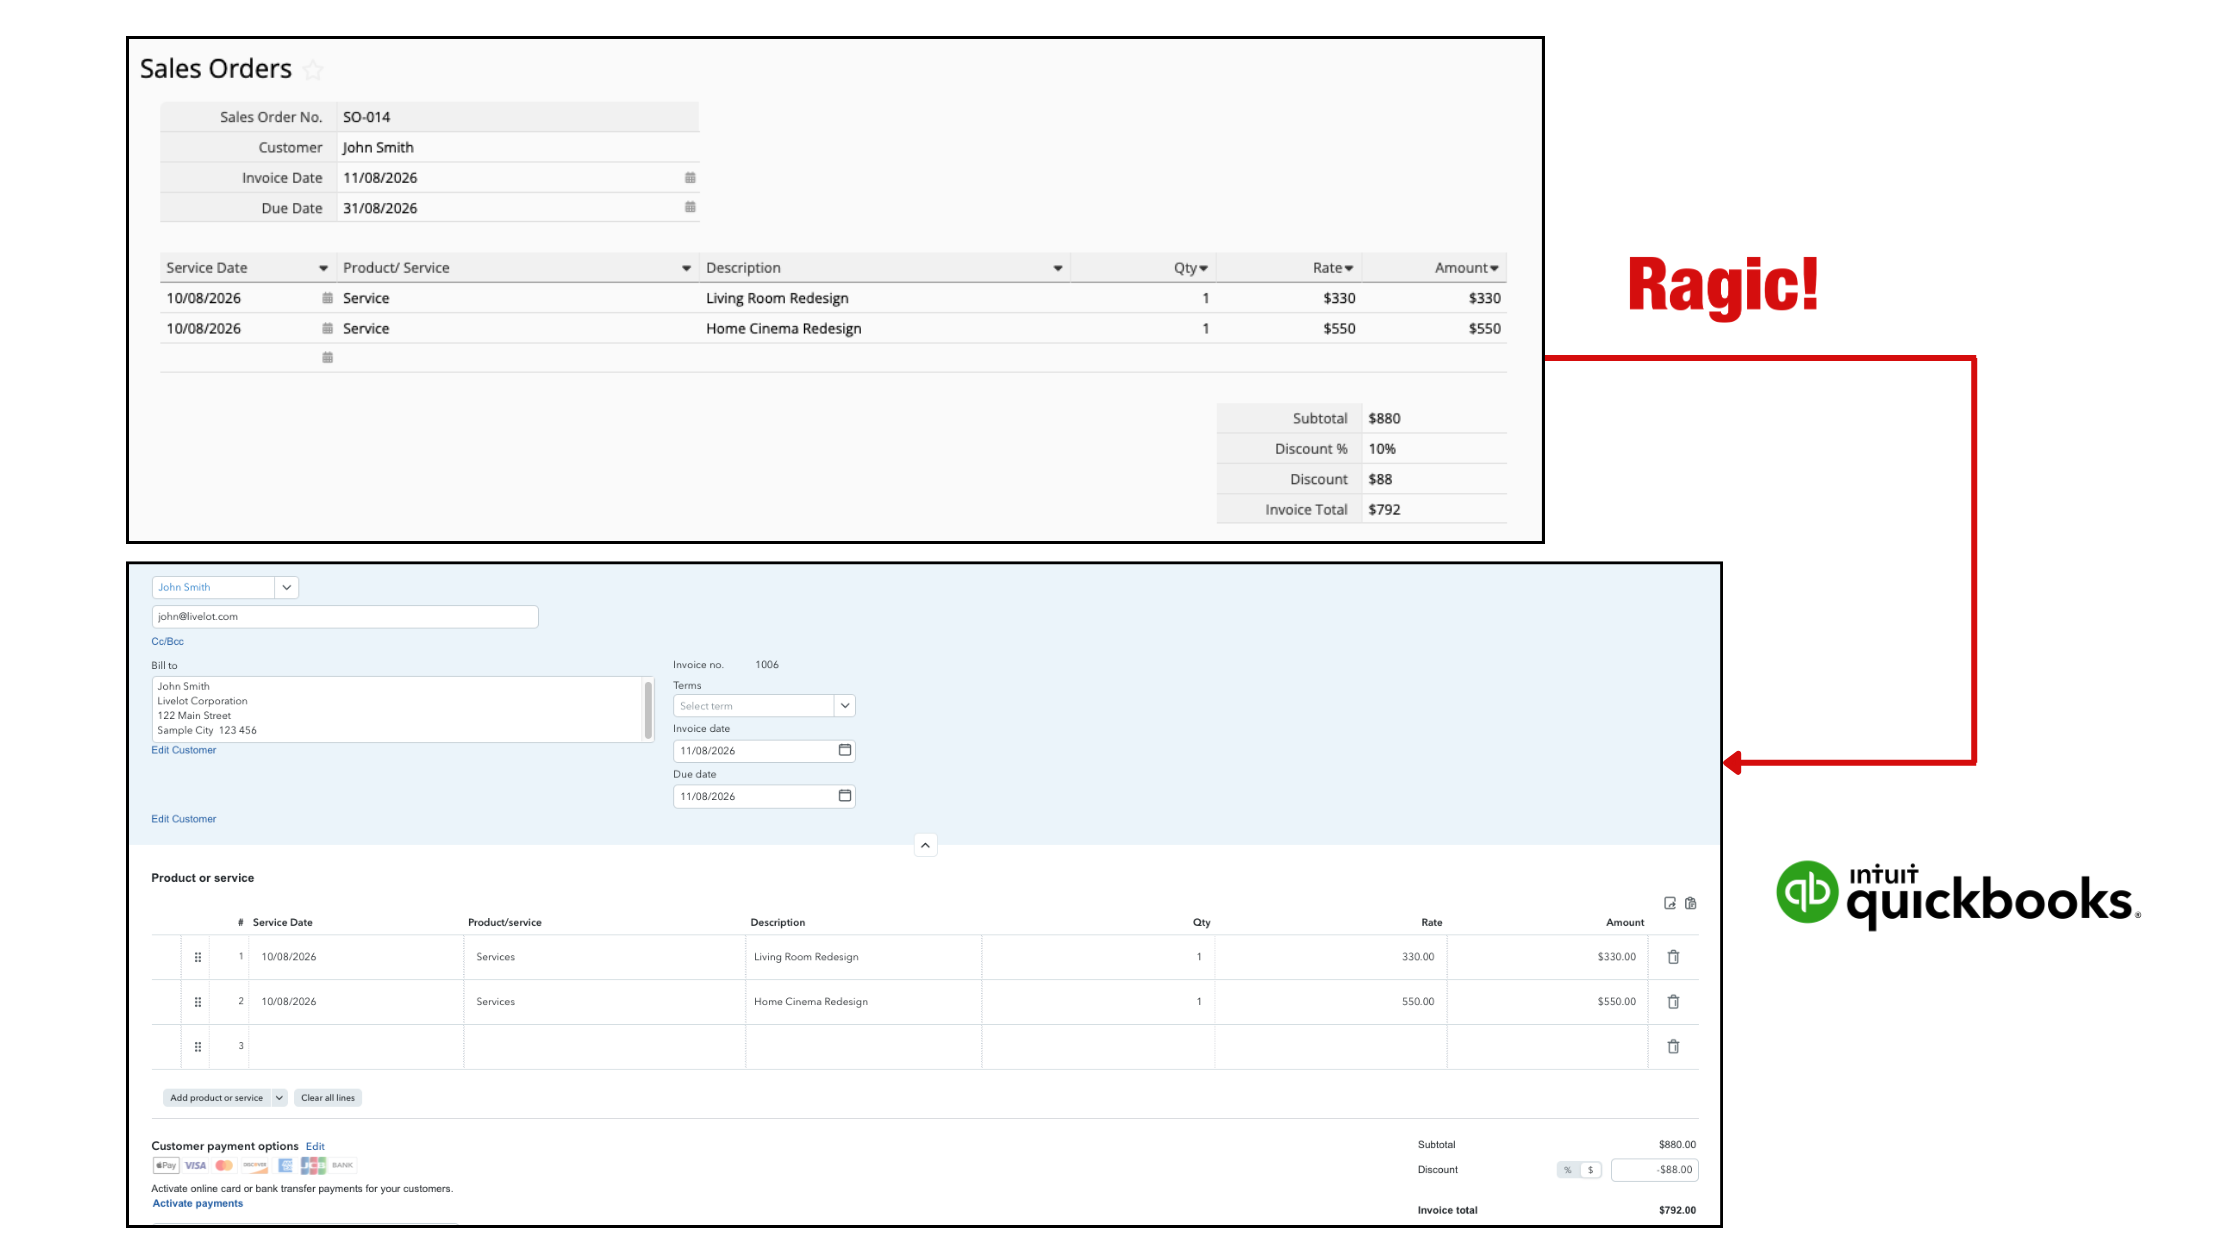
QuickBooks is available on Make at no additional cost for a limited number of credits, while QuickBooks is a premium Zapier app that requires a paid subscription. In this example, we’ll use Make to integrate Ragic with QuickBooks.
Let’s say ABC Company, an interior design business, wants to automatically create a QuickBooks invoice whenever a new Sales Order is created in Ragic. The following steps show how to set up this automation:
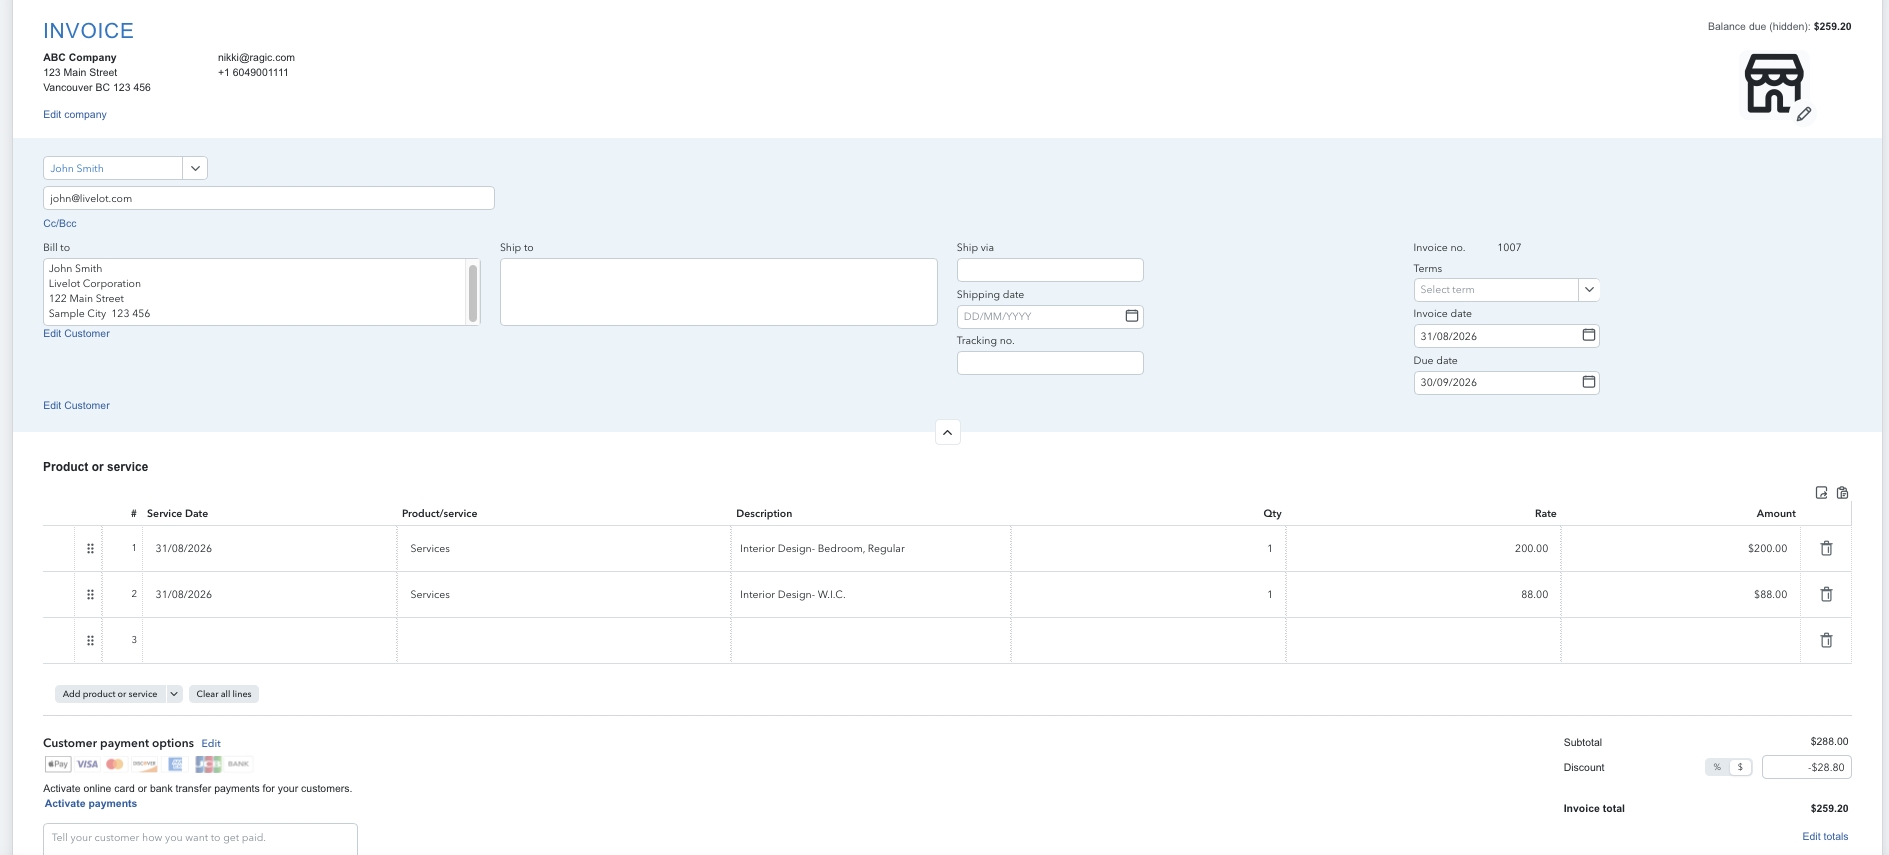
Before setting up the integration, identify which fields in QuickBooks need to be mapped to fields in Ragic. Below is an example of ABC Company’s Invoice in QuickBooks:
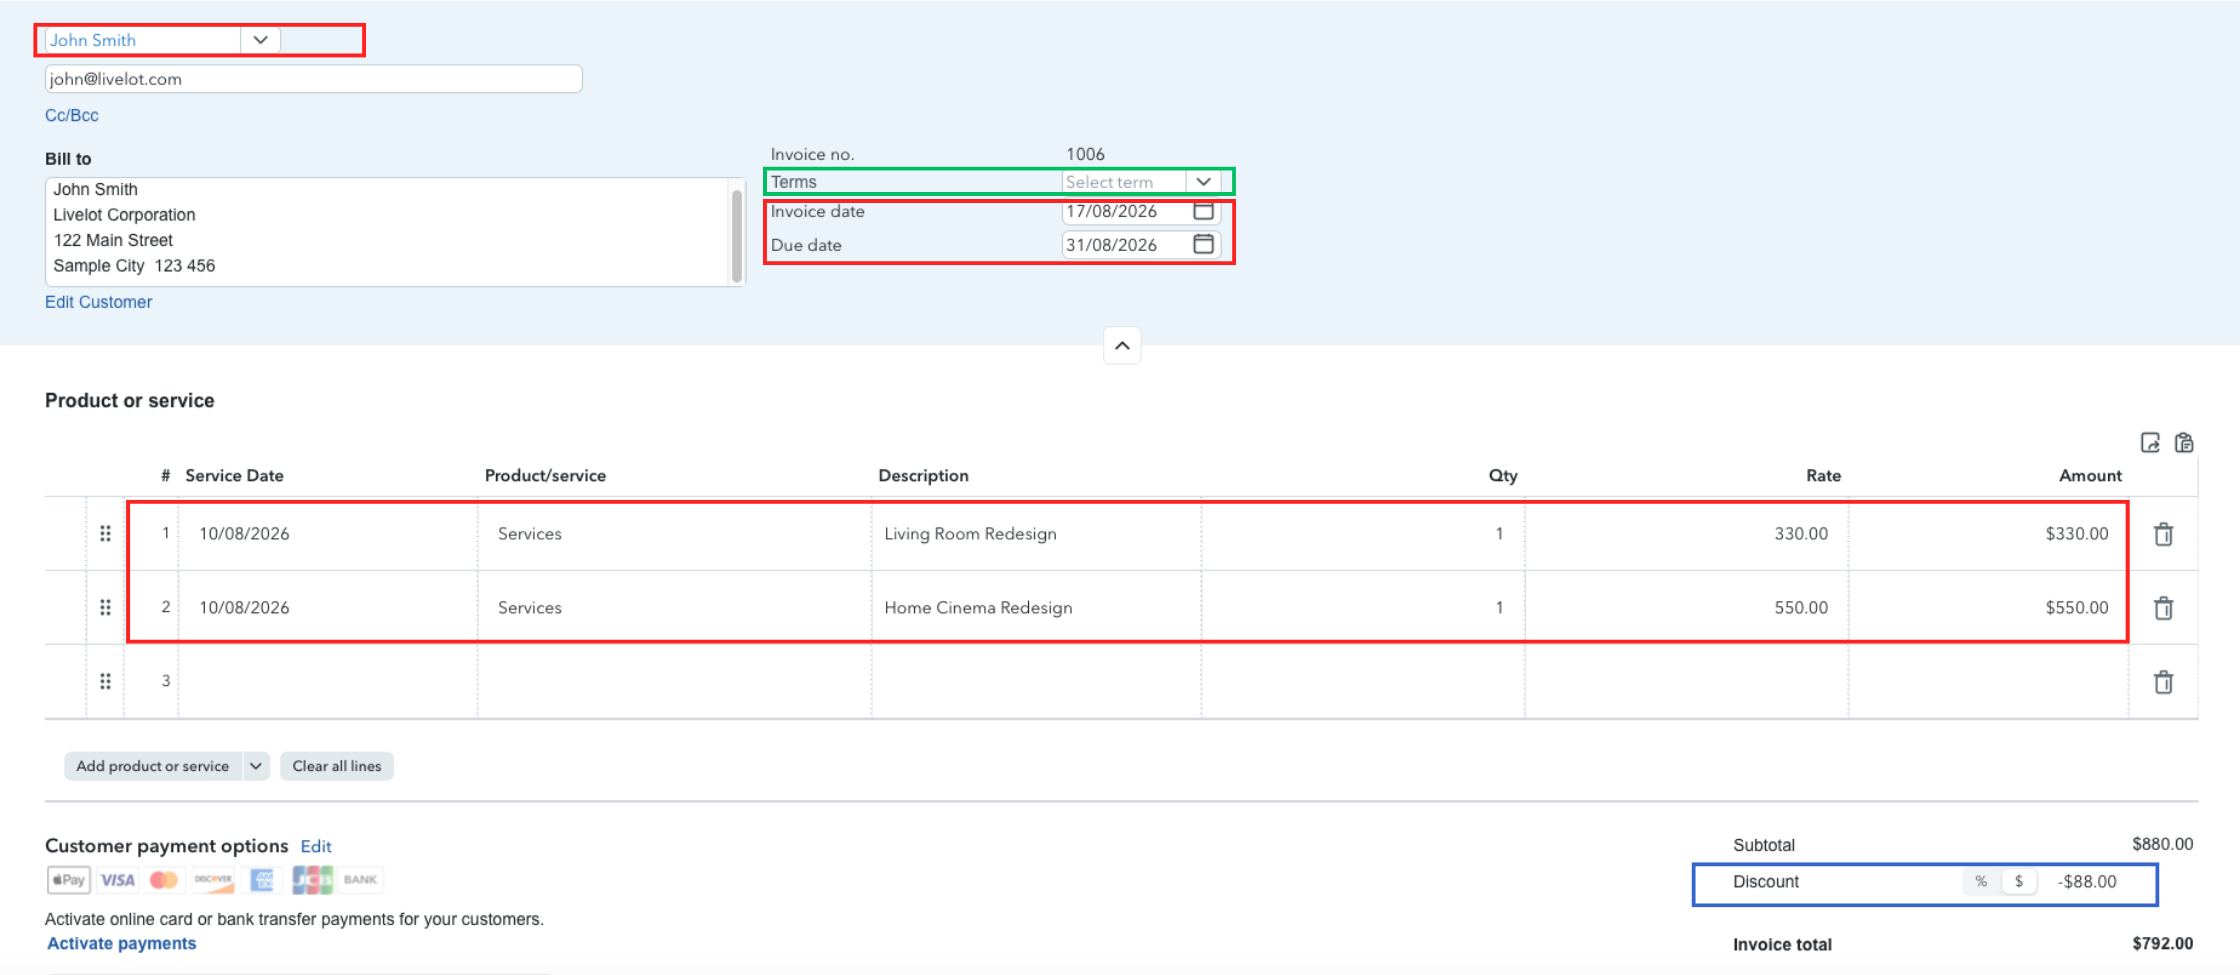
Make sure that all required QuickBooks fields highlighted in red have corresponding fields in your Ragic sheet. These fields will be mapped to QuickBooks when you set up the automation in Make.
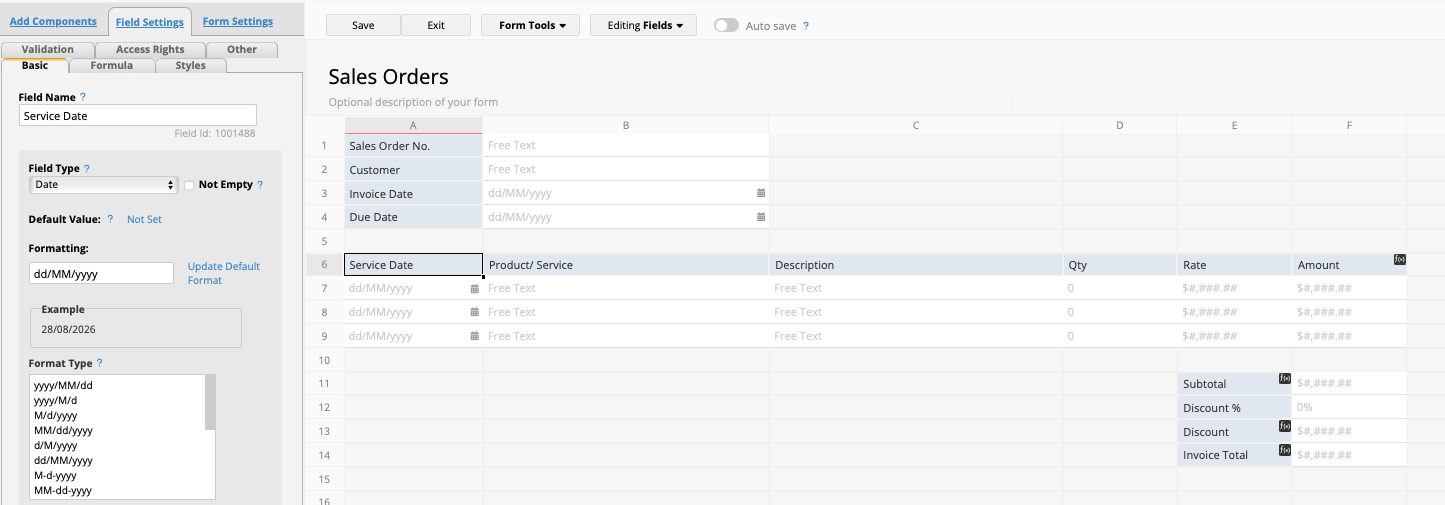
You should also make sure that your Ragic field format matches with the corresponding QuickBooks fields. For example, ABC Company’s QuickBooks Invoice uses the DD/MM/YYYY date format, so we need to format our Ragic Sales Order date fields accordingly.
You can add the required fields to an existing Sales Order sheet or to Ragic’s downloadable Sales Order Quick Template. You can also choose to build a Sales Order sheet from scratch, as shown below:
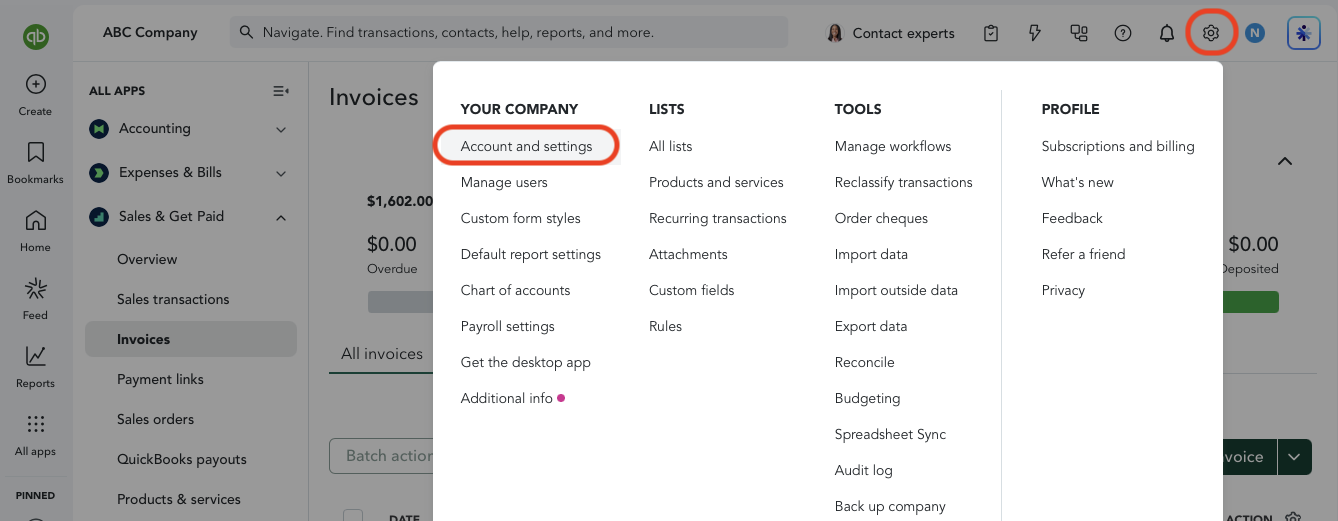
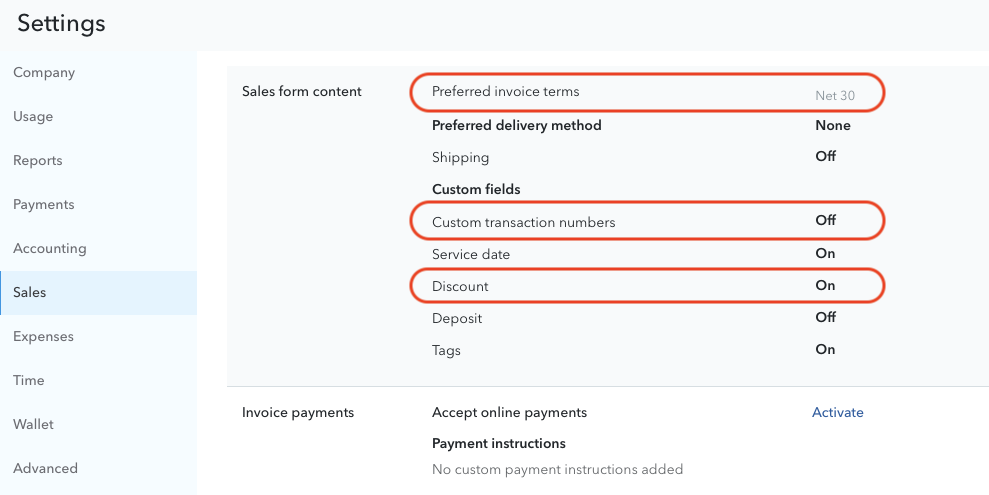
You can configure additional QuickBooks settings based on your business needs. To access these settings, navigate to the gear icon in the upper right corner, go to “Accounts and Settings” and select “Sales.”
Here, you can configure settings such as your preferred invoice terms and enable discount options. You can also disable custom transaction numbers to allow QuickBooks to automatically generate invoice numbers for you.
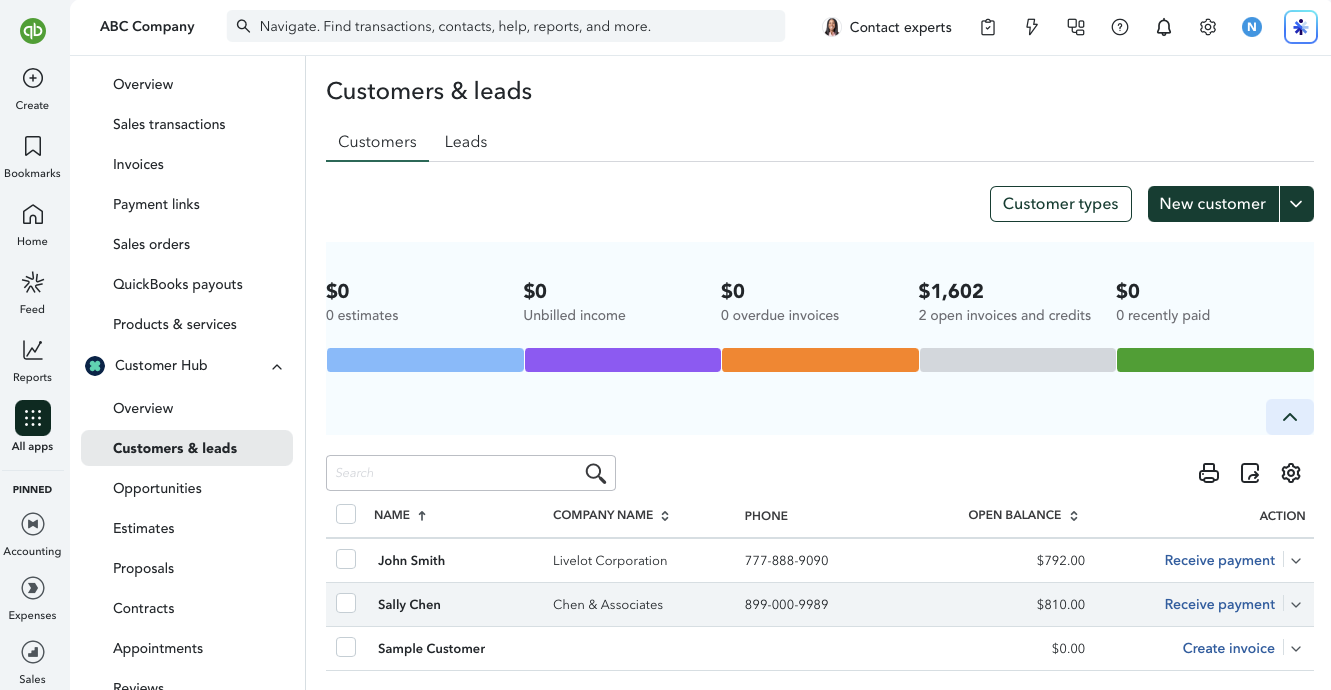
To ensure that QuickBooks correctly populates the “Bill To” and customer email fields, keep your QuickBooks Customer Hub records up to date and synchronized with your Ragic customer list.
The customer name entered in Ragic must match an existing customer record in QuickBooks. If QuickBooks cannot find a matching customer, the integration will return an error and the invoice will not be created.
Once you’ve aligned your Ragic sheet with QuickBooks’ Invoice fields and format, proceed with setting up the Integration in Make. You can refer to this article to learn more about Make Integrations with Ragic.
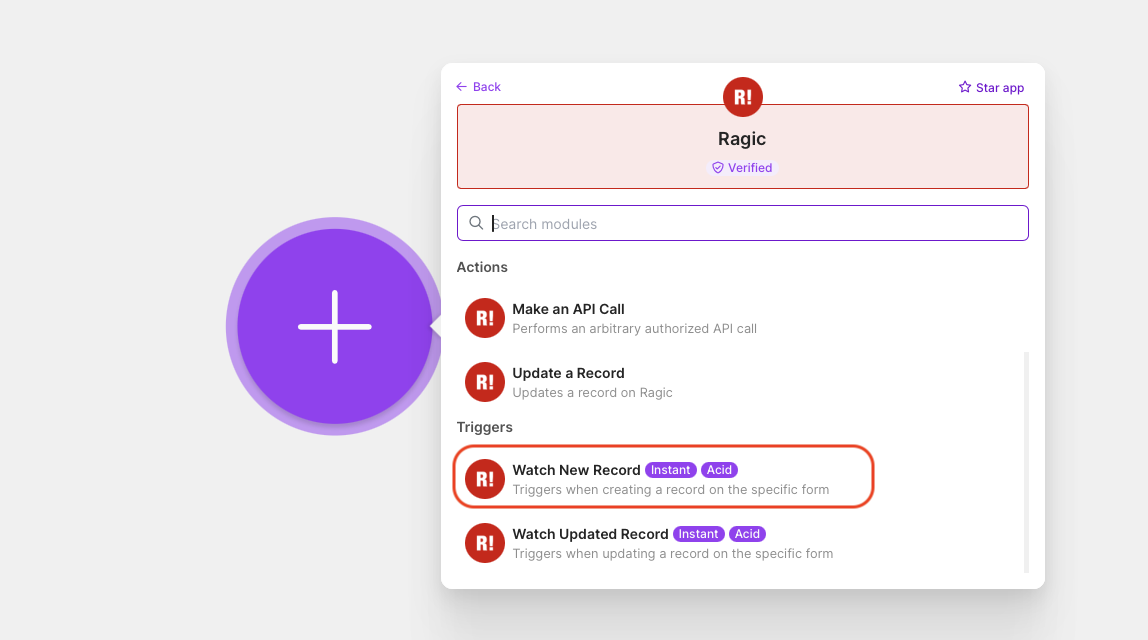
Click “Create Scenario” on the top right corner of your screen, press the plus sign, search for Ragic, then select “Watch New Record” as your trigger.
Make will then ask you to create a Webhook in the Ragic database. Obtain your Ragic account API Key from “Personal Settings” and server address, then paste them into Make. Your server address is the URL part before your database account. For example, if your Ragic URL looks like this: "http://ap12.ragic.com/sampledatabase", your server address would be "https://ap12.ragic.com"
Once you’ve connected your database, select the form you want to integrate and save the configuration. Run it once with a sample data to make sure your database is connected successfully.
Once the trigger has been set, click the plus sign beside the trigger, search for QuickBooks, and select “Search for Customer.” You will be asked to log into or connect your QuickBooks account without needing an API Key. Next, fill in the following:
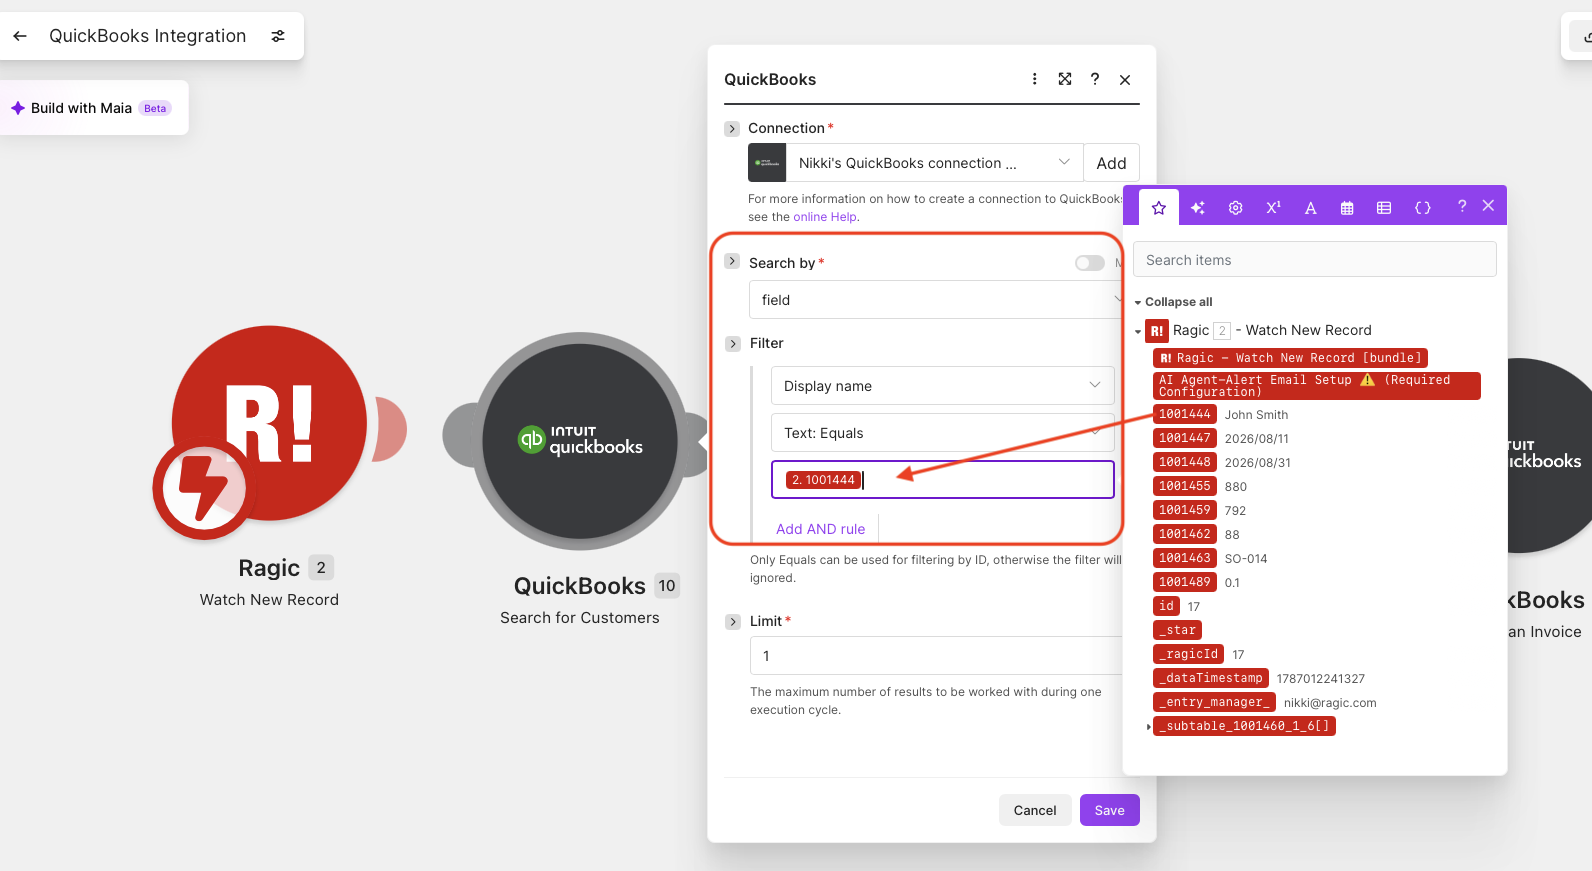
This step is necessary because QuickBooks inherently assigns internal system “IDs” to each customer these IDs to map information instead of the Customer Name. Since these system IDs are difficult to locate from the frontend, we assign an action that allows QuickBooks to map the customer name from Ragic to the corresponding customer record on QuickBooks.
Due to the differences in Ragic output format and QuickBooks input requirements, an Iterator and Aggregator is required for the system to go through your entire subtable and create separate data bundles for each row. Without them, only the first subtable line item from Ragic will transfer over to QuickBooks.
Click the plus sign beside the QuickBooks action and search for “Iterator.” Enable “array” and select the entire Ragic subtable. Run it once to test output and facilitate set up for the next action.
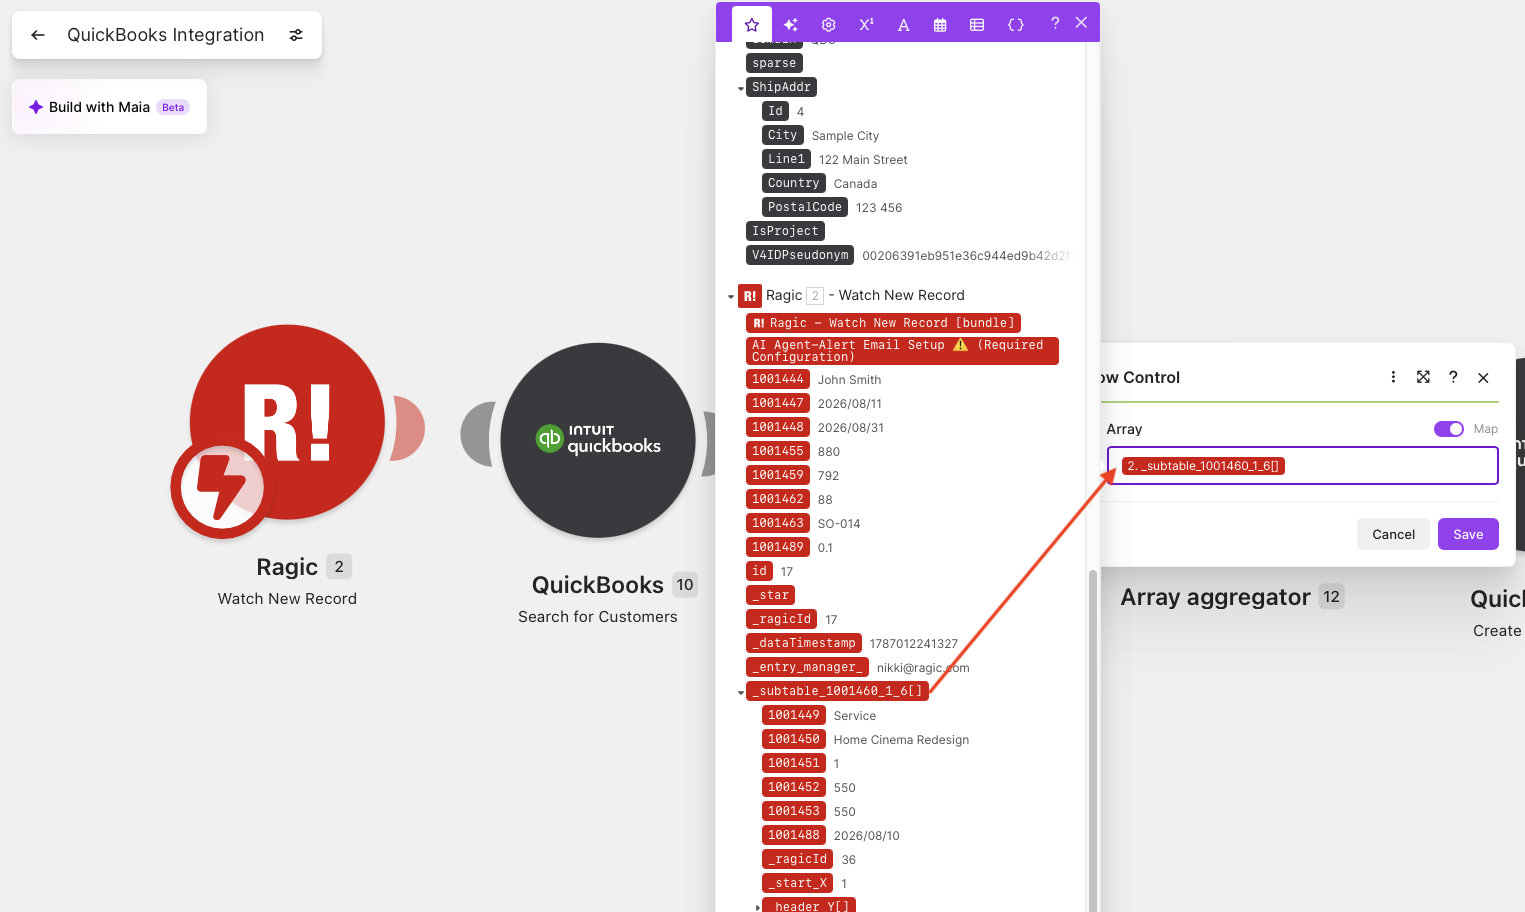
Next, click the plus sign and search for an “Array Aggregator.” Set the Iterator as your source module. We’ll come back to the aggregator later after creating the target module.
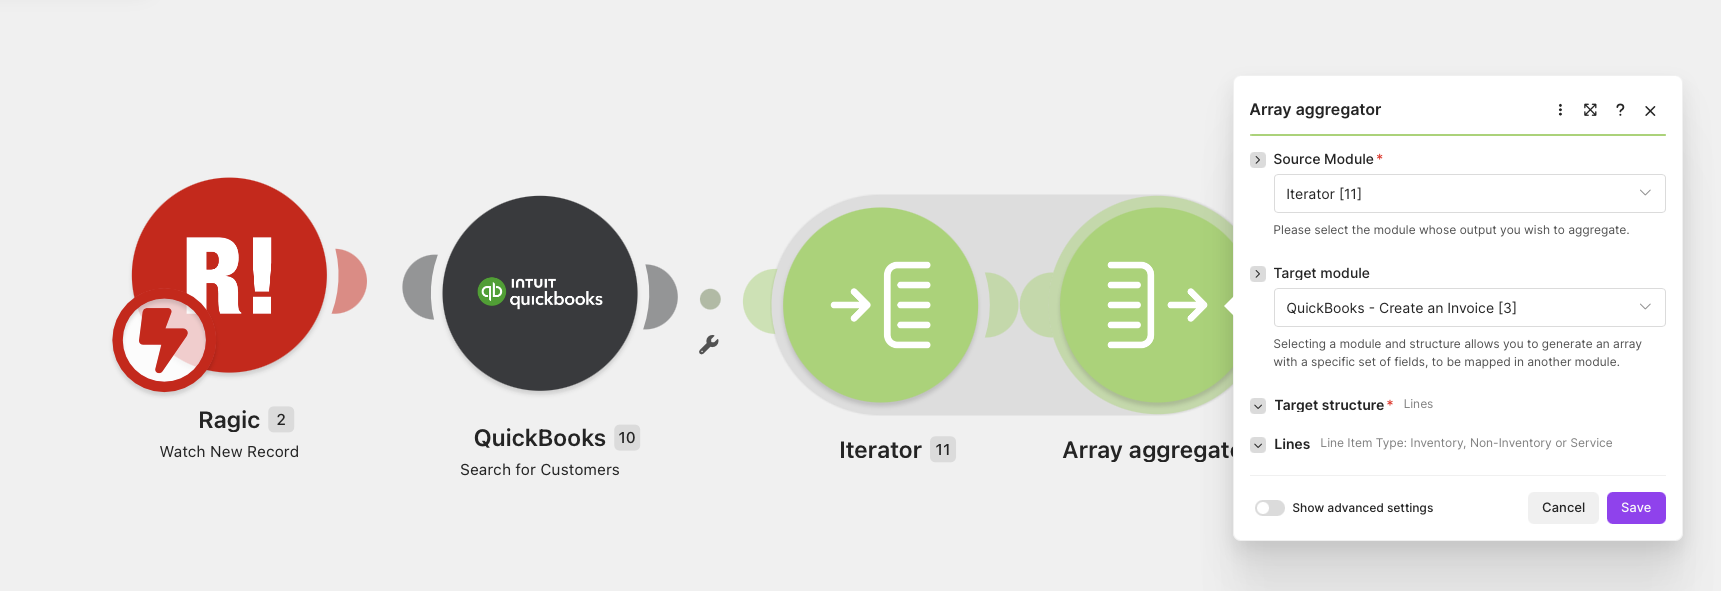
Click on the plus sign to create another action. Search for QuickBooks and select “Create an Invoice.”
Return to the Array Aggregator afterwards and select “QuickBooks Create an Invoice” as your target module, “lines” as your target structure, then select the corresponding fields from the “Iterator” output for Amount, Description, Service Date, Unit Price, and Quantity.
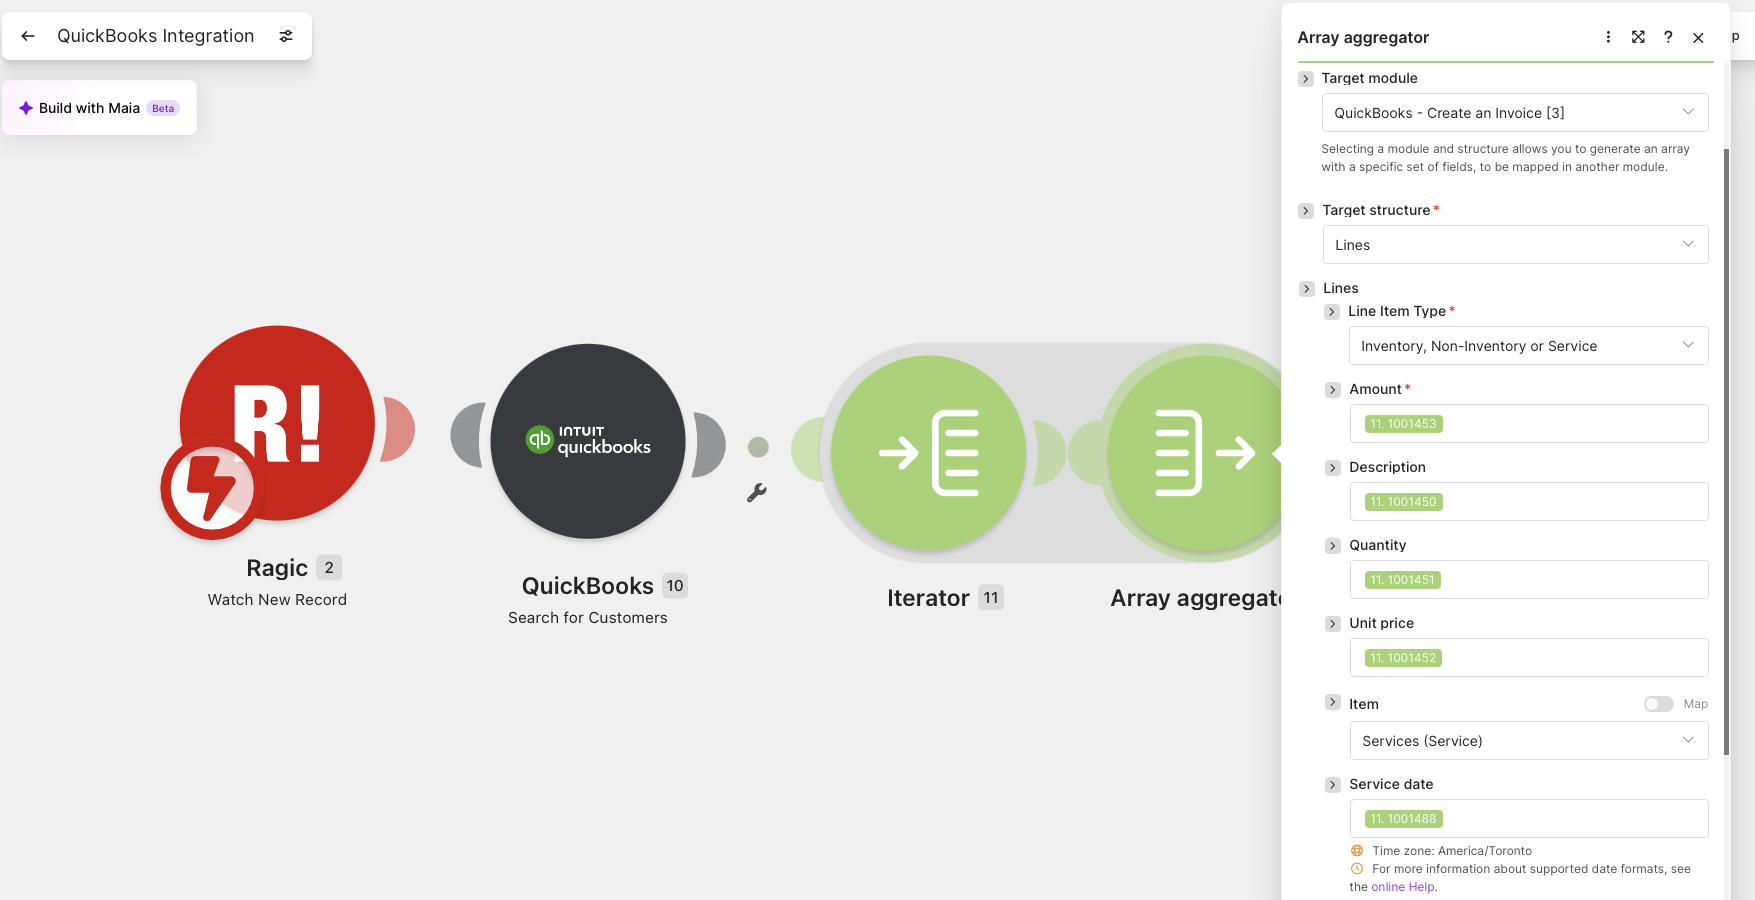
Finish setting up the QuickBooks target by filling in the following:
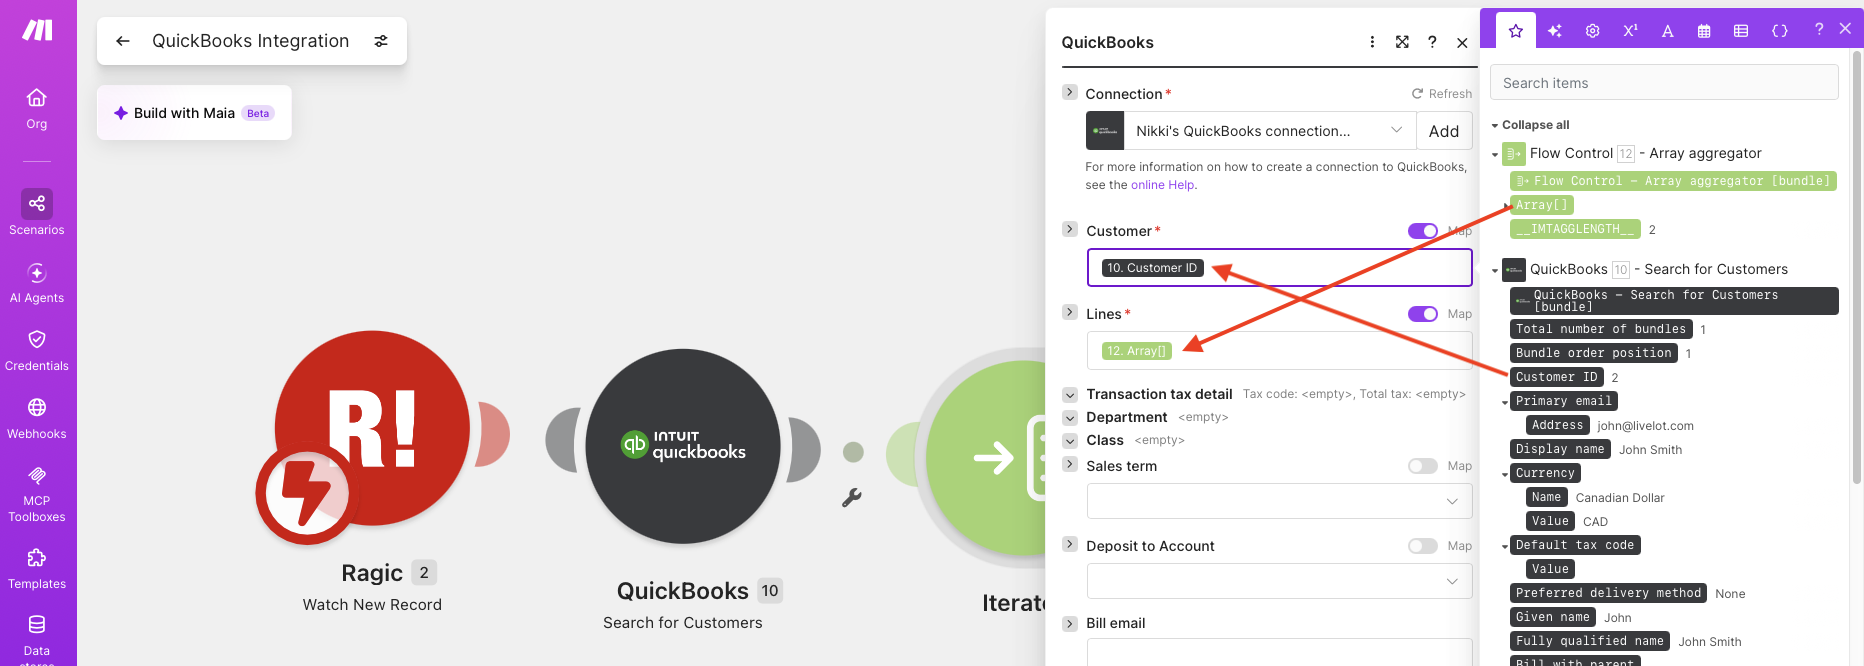
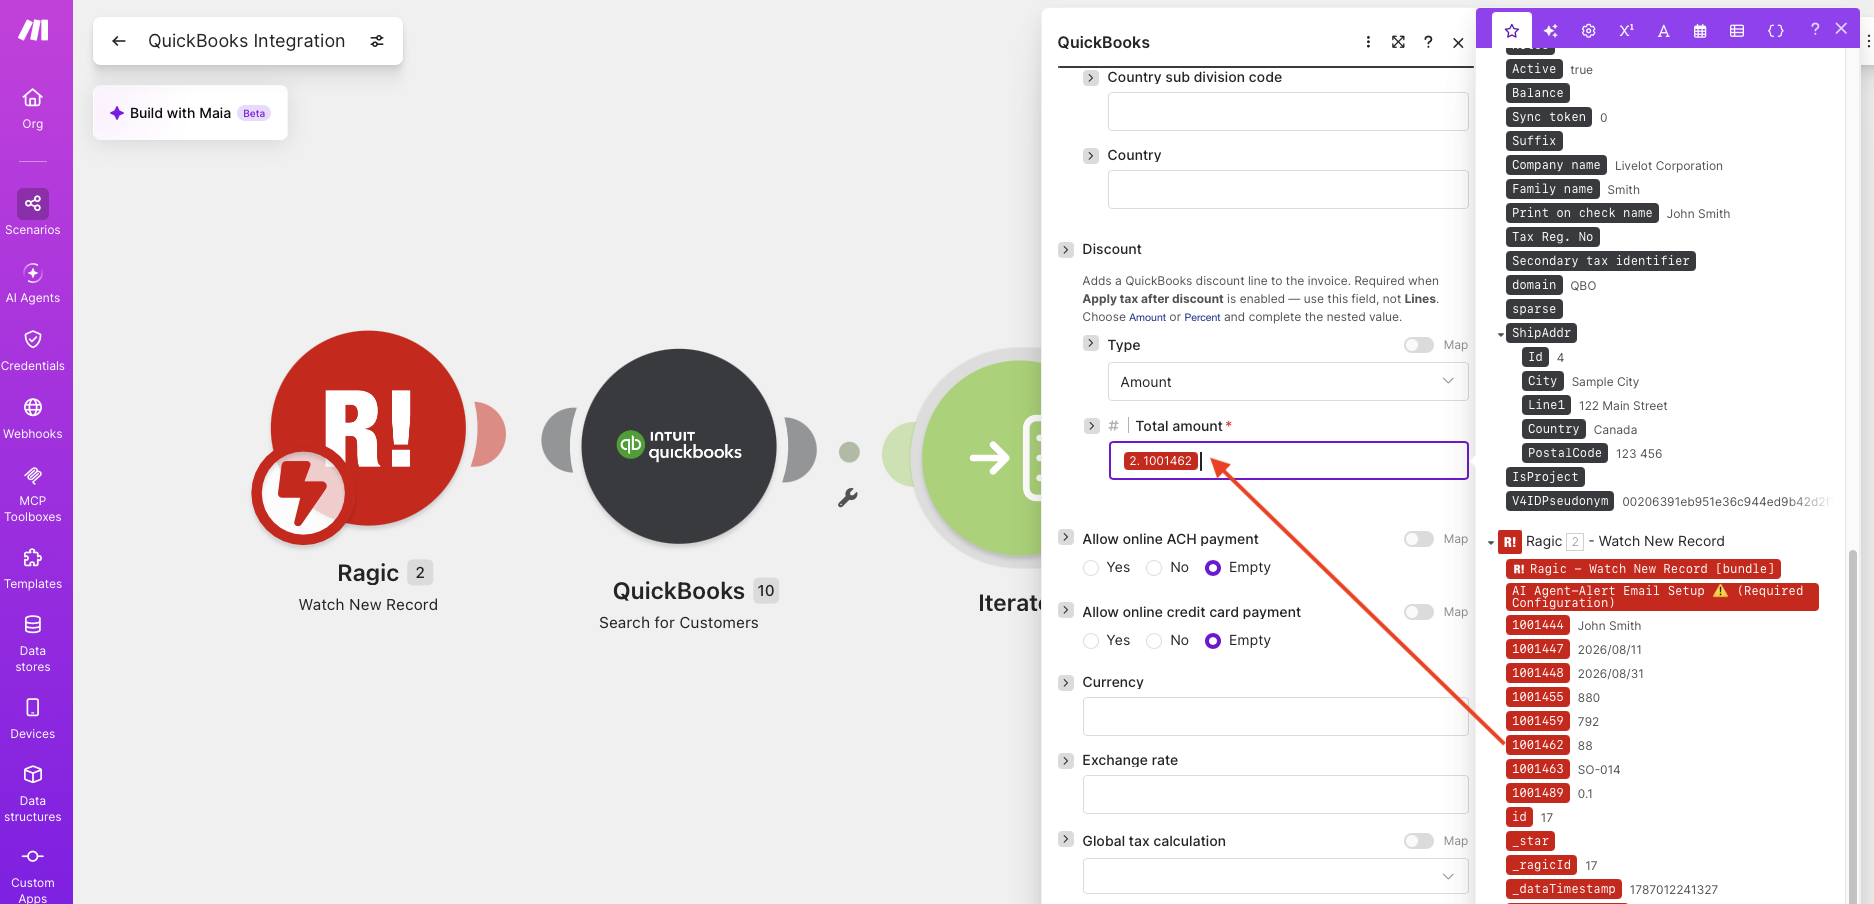
Save your settings, select “run once,” and create a new record on Ragic to make sure the corresponding Invoice is created successfully on QuickBooks. Once everything looks good, you can toggle “immediately as data arrives” or schedule the integration as needed and activate your scenario via the toggle below:

Once activated, you should be able to automatically create Invoices on QuickBooks whenever a Sales Order is created on Ragic.
The sample principles apply to instances where you’d need to integrate other Ragic sheets like “Job” or “Invoice” to QuickBooks for invoicing. Let’s assume ABC Company prefers to generate Invoices on Ragic and simultaneously create a corresponding Invoice on QuickBooks for accounting purposes.
Let’s use Ragic’s Invoice Quick Template as an example. Most of the required fields, such as “Invoice date,” “due date,” and line items are already set, so we just need to include the additional fields needed based on our QuickBooks invoice.
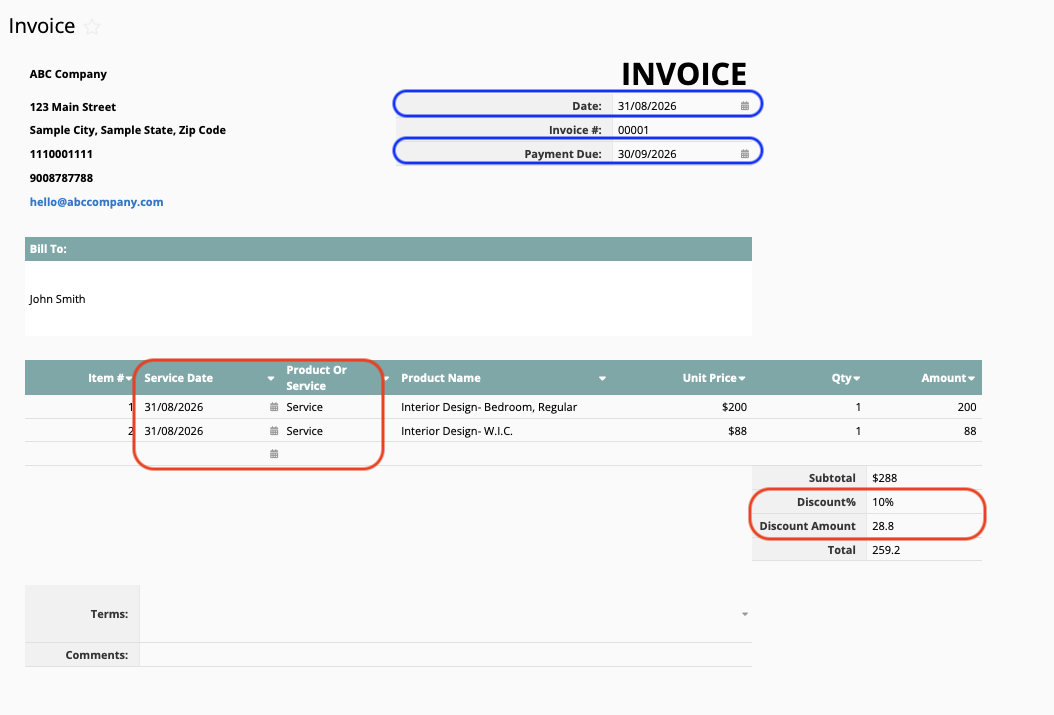
For ABC Company, we added “Service Date,” “Product or Service,” “Discount Rate,” and “Discount Amount.” We also changed the date formats to DD/MM/YYYY to better match our QuickBooks date formats.
Next, we need to set up our Make Integration. Make sure to choose the correct Invoice form when setting up your trigger. Choose the corresponding fields from your Ragic Invoice sheet when setting up actions using the same steps above.
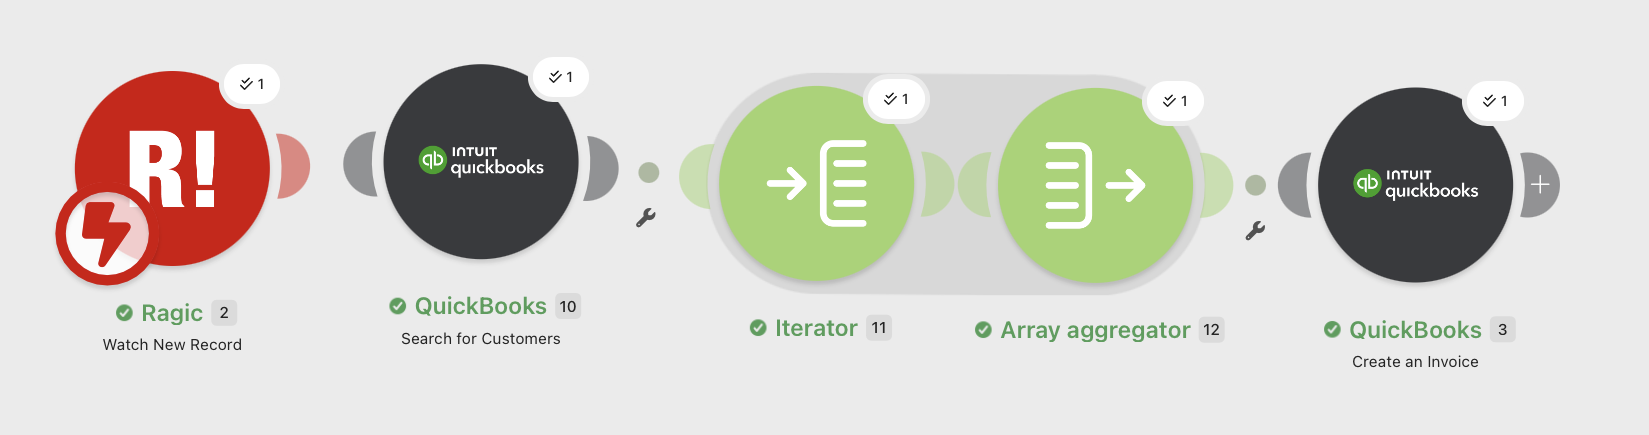
After setting up, run it once to make sure everything is functioning as expected. When you create an Invoice on Ragic like this:
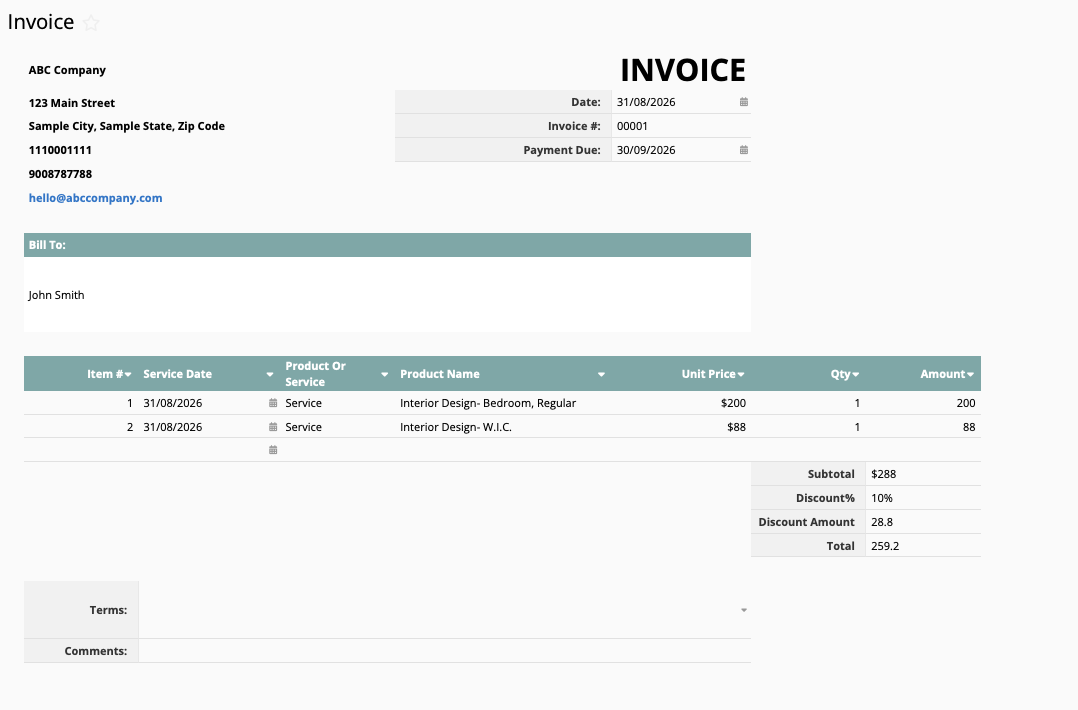
a corresponding Invoice should be created on QuickBooks:
 Thank you for your valuable feedback!